Frequently Asked Questions
Tutorial Questions
Why does my assembly graph in Bandage look different to the one pictured in the tutorial?
Why does my assembly graph in Bandage look different to the one pictured in the tutorial?
The assembly process in Flye is heuristic, and the resulting assembly will not necessarily be exactly the same each time. This may happen even if running the same data with the same version of Flye. It can also happen with a different version of Flye.
To make things more complicated (stop reading now if you would like!)… the chloroplast genome has a structure that includes repeats (the inverted repeats), and, the small-single-copy region of the chloroplast exists in two orientations between these repeats. So, sometimes the assembly will be a perfect circle, sometimes the inverted repeats will be collapsed into one piece, and sometimes the small-single-copy region will be attached ambiguously. To make things even more complicated…the chloroplast genome may even be a dynamic structure, due to flip flop recombination.
For more see this article
Running more than one round of Pilon polishing
Tip: Running more than one round of Pilon polishing
Include the most recent polished assembly as input to the next round. You will also need to make a new bam file (here, we have
round1.bamandround2.bam).Round 1
assembly.fasta + illumina reads => BWA MEM => round1.bamround1.bam + assembly.fasta => pilon => polished.fastaRound 2
polished.fasta + illumina reads => BWA MEM => round2.bamround2.bam + polished.fasta => pilon => polished2.fastaHow to know when enough polishing iterations have run?
There is no single answer, but a common way is to see when pilon stops making many polishing changes between rounds. So if round1 made 100 changes, and round2 made only 3, this seems like there would not be much more polishing to do.
How can I see how many changes Pilon has made?
There are two ways that I know of to see how many changes that Pilon made:
The first is to look at the tool standard output (
stdout) from Pilon (instructions).Somewhere near the top of this log file will be a line that says how many corrections (changes) were made.
The second way is to count the number of lines in the changes file. To do this, use the tool called Line/Word/Character count tool, and select the line count option.
Can we polish the assembly with long reads too?
Tip: Can we polish the assembly with long reads too?
Yes. In this tutorial, we only polish the assembly with the short reads. This may be enough for bacterial genomes. However, for an even better polish (usually), a common approach is to also polish the assembly with the long reads. A typical workflow for this would assemble with long reads, then polish with long reads (x 4 rounds, with Racon), polish with long reads again (x 1 round, with Medaka), then polish with short reads (x2 rounds with Pilon).
General Questions
Can't find one of the tools for this tutorial?
Tip: If a Tool is Missing
To use the tools installed and available on the Galaxy server:
- At the top of the left tool panel, type in a tool name or datatype into the tool search box.
- Shorter keywords find more choices.
- Tools can also be directly browsed by category in the tool panel.
If you can’t find a tool you need for a tutorial on Galaxy, please:
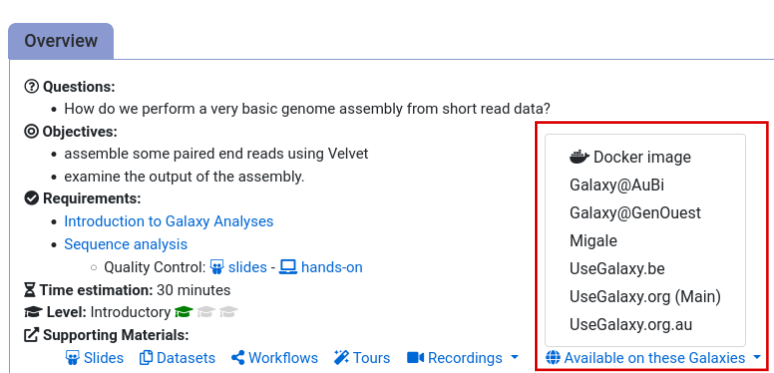
- Check that you are using a compatible Galaxy server
- Navigate to the overview box at the top of the tutorial
- Find the “Supporting Materials” section
- Check “Available on these Galaxies”
- If your server is not listed here, the tutorial is not supported on your Galaxy server
- You can create an account on one of the supporting Galaxies
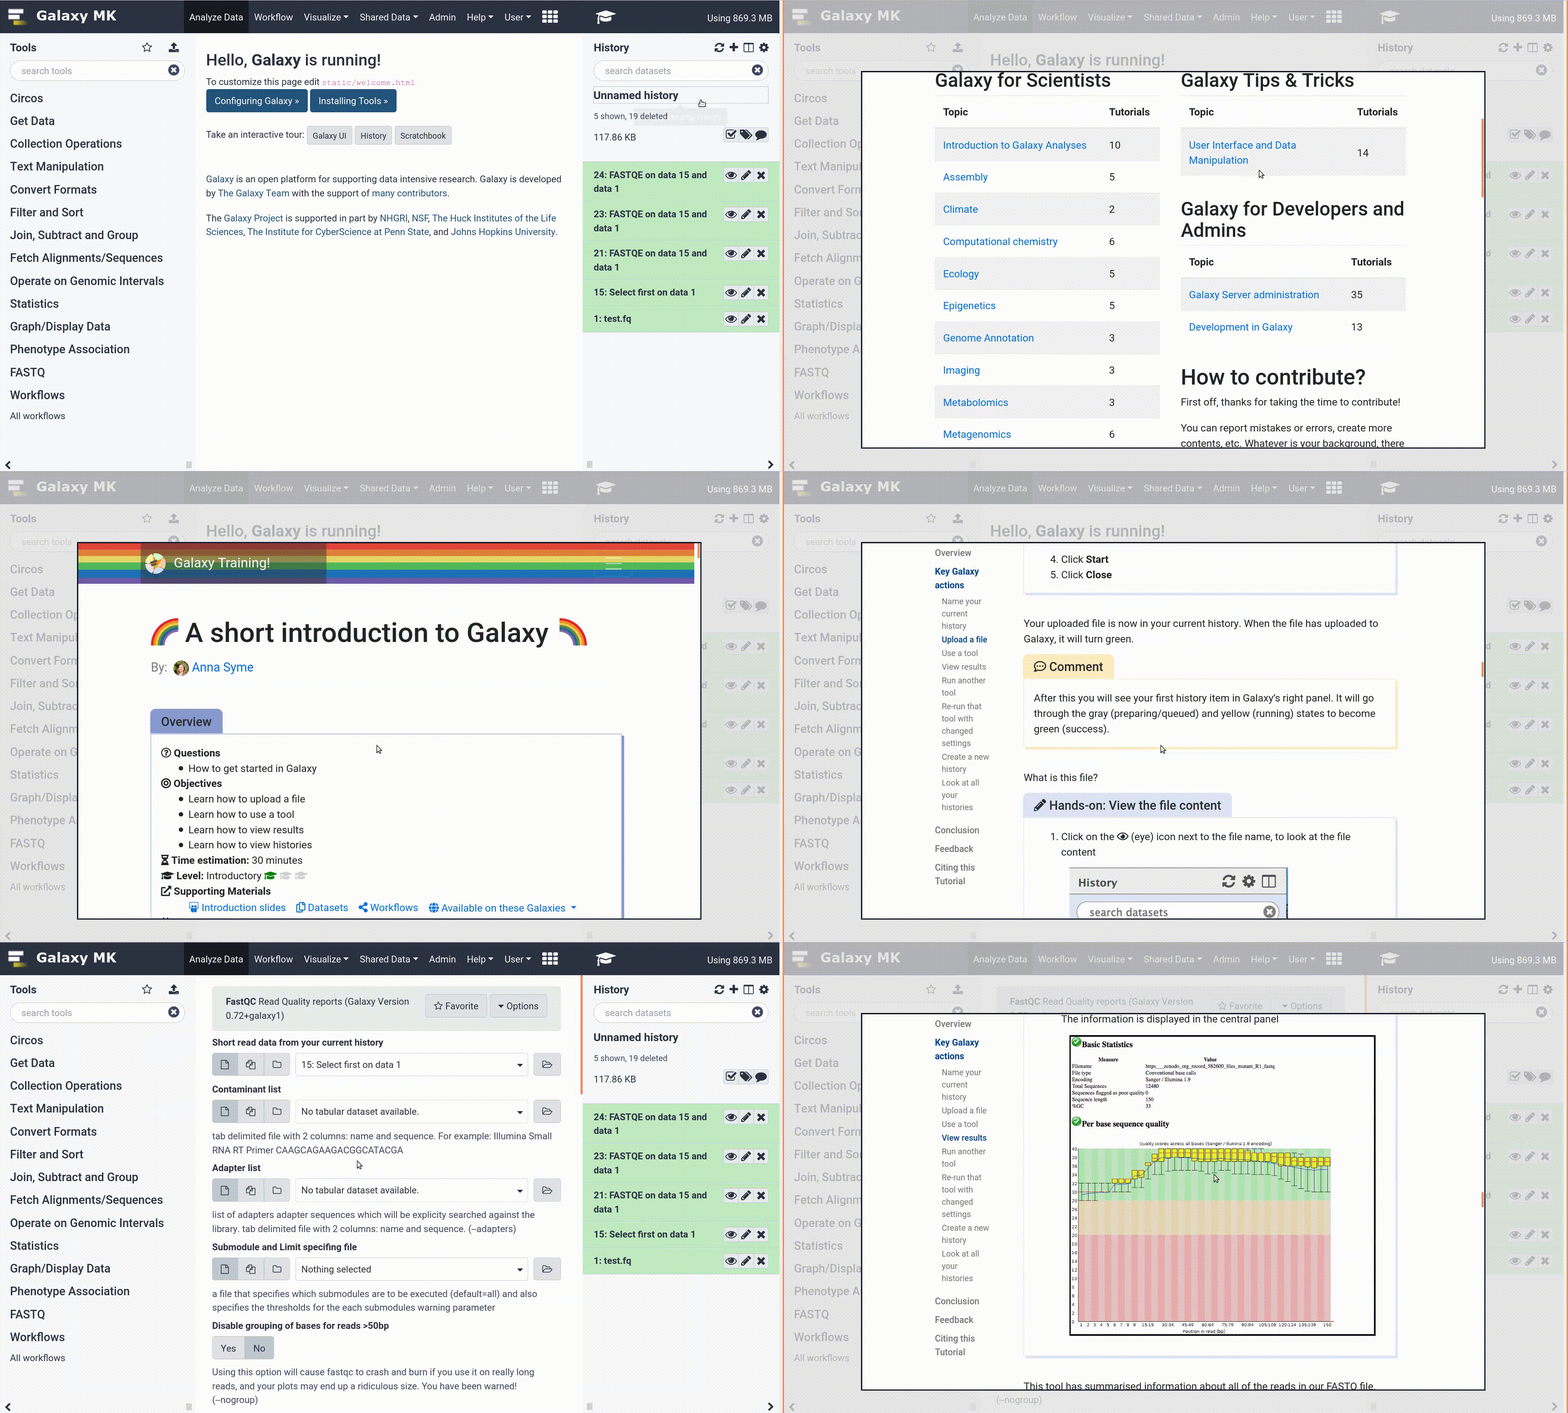
- Use the Tutorial mode feature
- Open your Galaxy server
- Click on the curriculum icon on the top menu, this will open the GTN inside Galaxy.
- Navigate to your tutorial
- Tool names in tutorials will be blue buttons that open the correct tool for you
- Note: this does not work for all tutorials (yet)
- Still not finding the tool?
- Ask help in Gitter.
Running into an error?
Tip: Troubleshooting errors
When something goes wrong in Galaxy, there are a number of things you can do to find out what it was. Error messages can help you figure out whether it was a problem with one of the settings of the tool, or with the input data, or maybe there is a bug in the tool itself and the problem should be reported. Below are the steps you can follow to troubleshoot your Galaxy errors.
- Expand the red history dataset by clicking on it.
- Sometimes you can already see an error message here
View the error message by clicking on the bug icon galaxy-bug
- Check the logs. Output (stdout) and error logs (stderr) of the tool are available:
- Expand the history item
- Click on the details icon
- Scroll down to the Job Information section to view the 2 logs:
- Tool Standard Output
- Tool Standard Error
- Submit a bug report! If you are still unsure what the problem is.
- Click on the bug icon galaxy-bug
- Write down any information you think might help solve the problem
- See this FAQ on how to write good bug reports
- Click galaxy-bug Report button
- Ask for help!
- Where?
- In the GTN Gitter Channel
- In the Galaxy Gitter Channel
- Browse the Galaxy Help Forum to see if others have encountered the same problem before (or post your question).
- When asking for help, it is useful to share a link to your history

